
Discord slash commands are great for quick actions, but when you're running a competitive community with dozens (or hundreds) of players, sometimes you need a proper dashboard. That's what the Team Up admin dashboard gives you. It's a browser-based interface for managing your server's leaderboards, players, matches, and settings.
This guide covers what the dashboard can do and how to get your moderators and staff set up with the right level of access.
Logging In
Head to teamupgg.com/app/login and sign in with Discord. The dashboard automatically detects every server where you have Administrator or Manage Server permissions. Those servers appear on your home screen, and you get full admin access to them automatically.
If you don't have those Discord permissions but someone has granted you dashboard access (more on that below), those servers will show up too, with whatever permission level you've been assigned.
The Dashboard Home
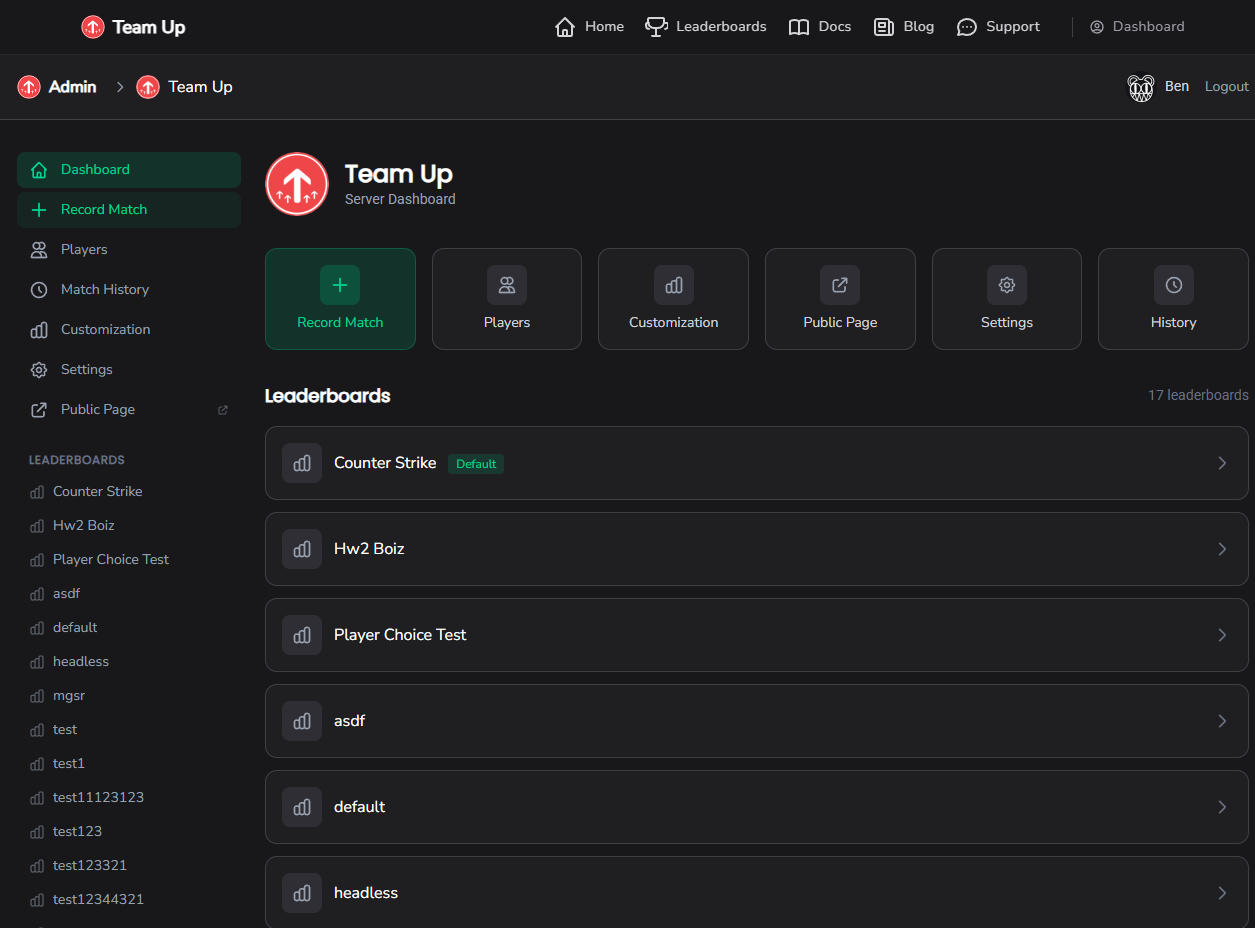
Once you select a server, you land on the server dashboard. This is your hub with quick-action cards that link to the main sections:
- Record Match — log match results directly from the browser
- Players — view and manage all tracked players
- Match History — browse and delete past matches
- Customization — set up custom stats and player choice sets
- Settings — configure your server, leaderboards, and channels
- Public Page — jump to your server's public leaderboard page
You'll also see a list of all your leaderboards with quick links to each one.
Recording Matches
The Record Match page gives you more control than the Discord command. You can:
- Select a leaderboard from a dropdown instead of typing names
- Add multiple placements with a clean multi-entry interface
- Search for players by name as you build the match
- Switch between Auto and Manual mode. Auto calculates Elo changes from placements, Manual lets you enter custom rating deltas
- Fill in custom stats if your leaderboard has them configured (numeric, text, or select types)
- Undo or redo previous matches with a single click, including a preview of what will change
The page also shows your 10 most recent matches for quick reference.
Managing Players
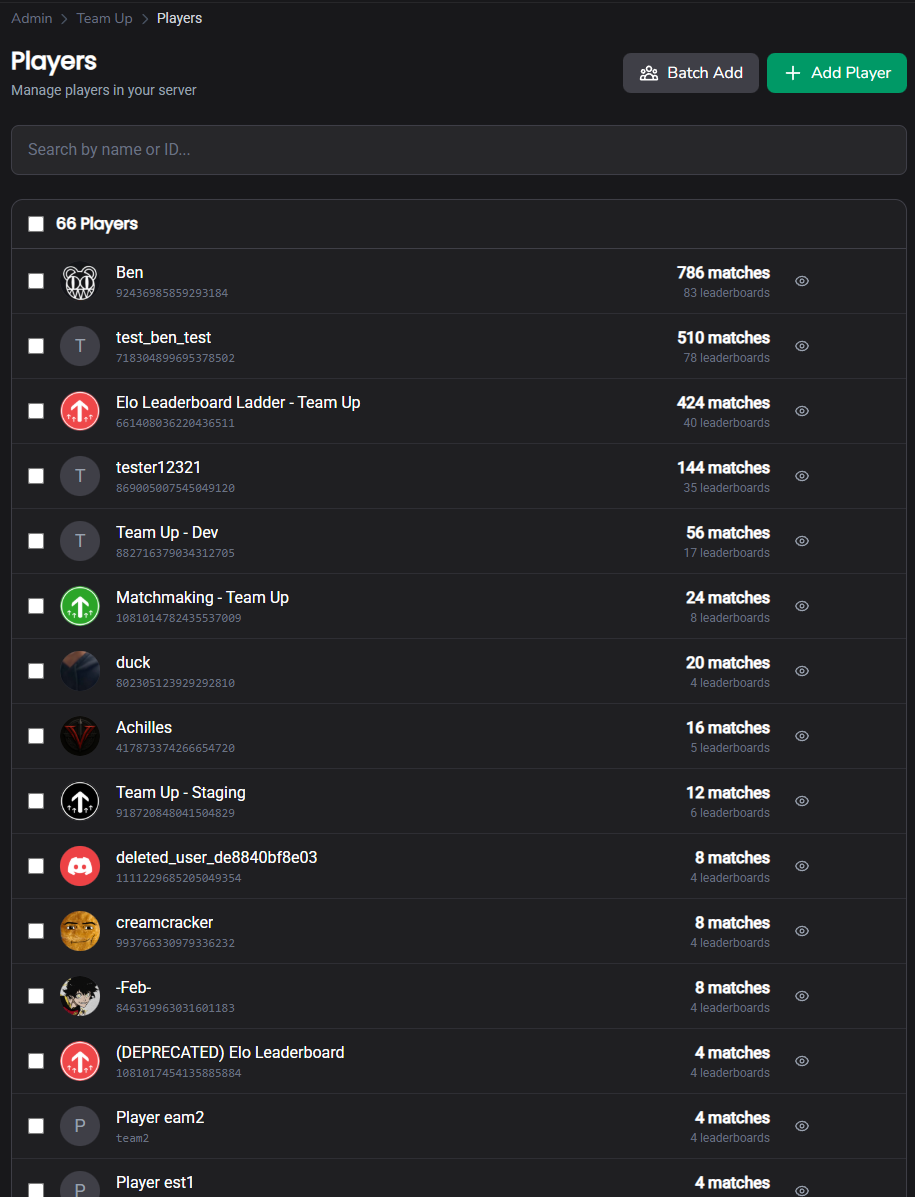
The Players page is where you manage everyone tracked in your server. You can:
- Search by player name or ID
- Add a single player by Discord ID or as a manual (non-Discord) player, with optional profile customization including display name, avatar, banner, bio, colors, and gaming connections (Steam, Xbox, PlayStation, and more)
- Batch add players with a shared leaderboard and starting rating
- Toggle visibility to hide or show players on leaderboards with the eye icon
- Batch actions to select multiple players and hide, show, set a rating, or delete them in bulk
- View stats for each player including match count and leaderboard participation
Match History
The Match History page lets you browse every recorded match. Each entry expands to show:
- Timestamp
- All placements and participants
- Elo changes per player with a visual breakdown
You can filter by leaderboard, load more results (25 at a time), and delete matches when needed. The bot automatically reverses the rating changes.
Customization
The Customization page is for setting up advanced tracking:
- Custom Stats — define numeric, text, or select-type stats that get recorded with each match or each player entry. Numeric stats support aggregation (sum, average, min, max).
- Choice Sets — create player choice categories (like weapon, character, or difficulty) that segment ratings during match recording.
These are optional features for communities that want to track more detailed data.
Server Settings
The Settings page has the most going on. It's organized into tabs.
Server Tab
Server Profile lets you customize how your server appears on the public page: display name, description, icon, banner, colors, and whether it's listed publicly. You can also set an invite link.
Custom URL (Pro feature) gives your server a branded leaderboard URL instead of the default ID-based one. The slug must be 3-32 characters, lowercase letters, numbers, and hyphens only.
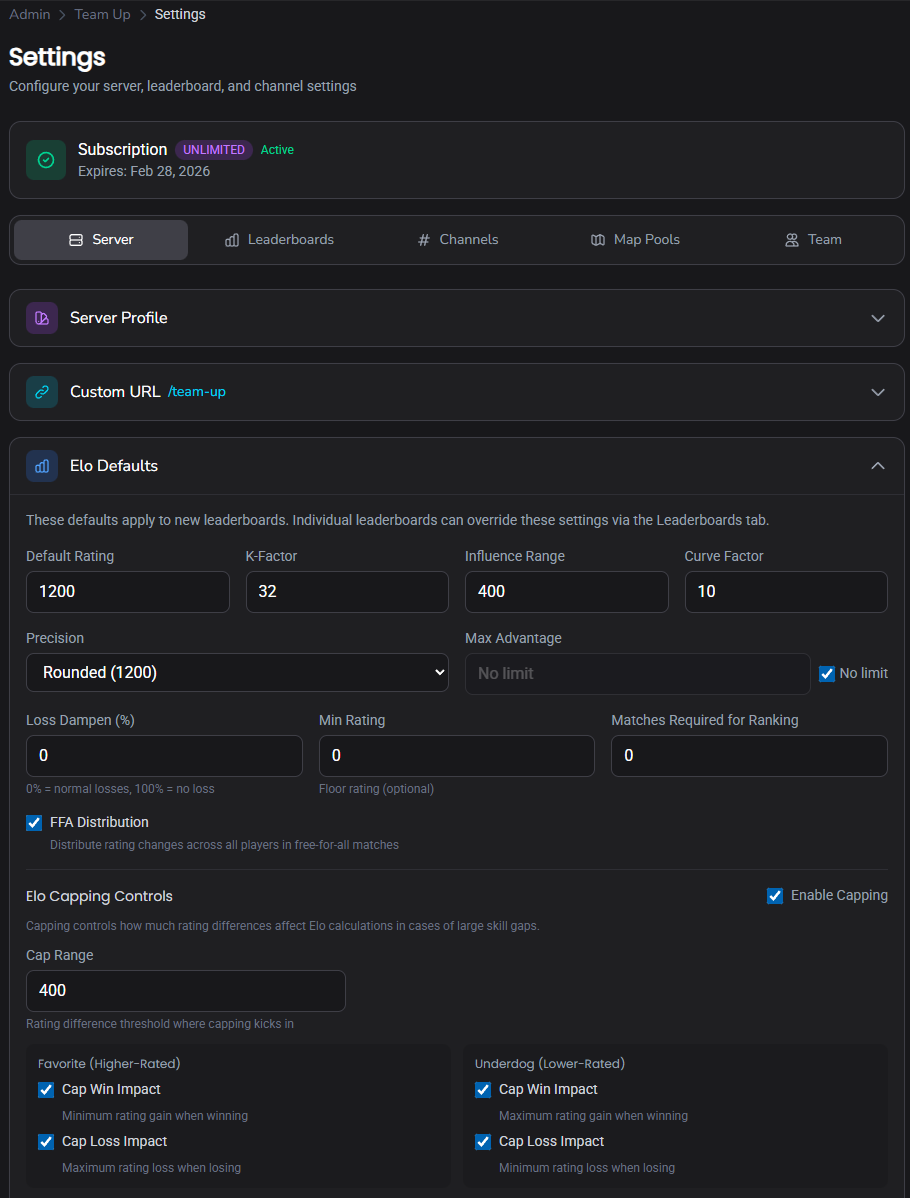
Elo Defaults is where you configure the rating system for all leaderboards:
- Default rating — starting Elo for new players (default: 1200)
- K-factor — how much ratings swing per match (default: 32)
- Precision — rounded, 2 decimals, or full precision
- Influence range — the rating difference window that affects calculations
- Curve factor — controls how rating spread affects gains/losses
- Max advantage — cap or unlimited for rating difference calculations
- Loss dampen — reduce losses by a percentage (0-100%)
- Min rating floor — optional minimum rating a player can drop to
- Matches required — how many games before a player appears on the leaderboard
- FFA distribution — toggle for free-for-all match handling
Elo Capping gives you fine-grained control over how large skill gaps affect ratings, with independent toggles for favorite win/loss and underdog win/loss impact.
Featured Ratings (Pro feature, up to 10) let you highlight specific ratings on your server's public page, with drag-to-reorder support and optional custom URLs.
Audit Channel lets you set a Discord channel ID to log admin actions like match deletions and rating resets.
Leaderboards Tab
Configure each leaderboard individually with its own profile (name, description, icon, banner, colors), Elo settings that override server defaults, ranking thresholds, inactive player handling, and farming detection, which flags suspicious win streaks against the same opponent and optionally pings a Discord channel and role.
Channels Tab
Map Discord channels to specific leaderboards. Each mapping has a primary leaderboard, an optional secondary leaderboard, and an optional reporting channel. This controls which leaderboard is used by default when commands are run in that channel.
Assigning Dashboard Access to Your Team
This is one of the most useful features for growing communities. Instead of giving everyone Discord's "Manage Server" permission just so they can record matches, you can grant dashboard-specific access with three permission levels.
The Three Roles
| Role | What They Can Do |
|---|---|
| Viewer | View the dashboard, player stats, and match history. Read-only access. |
| Manager | Everything a Viewer can do, plus record matches, manage players, and toggle player visibility. |
| Admin | Full access to everything, including all settings, leaderboard configuration, and team management. |
Users with Discord's Administrator or Manage Server permission always get full admin access automatically. You don't need to grant them anything.
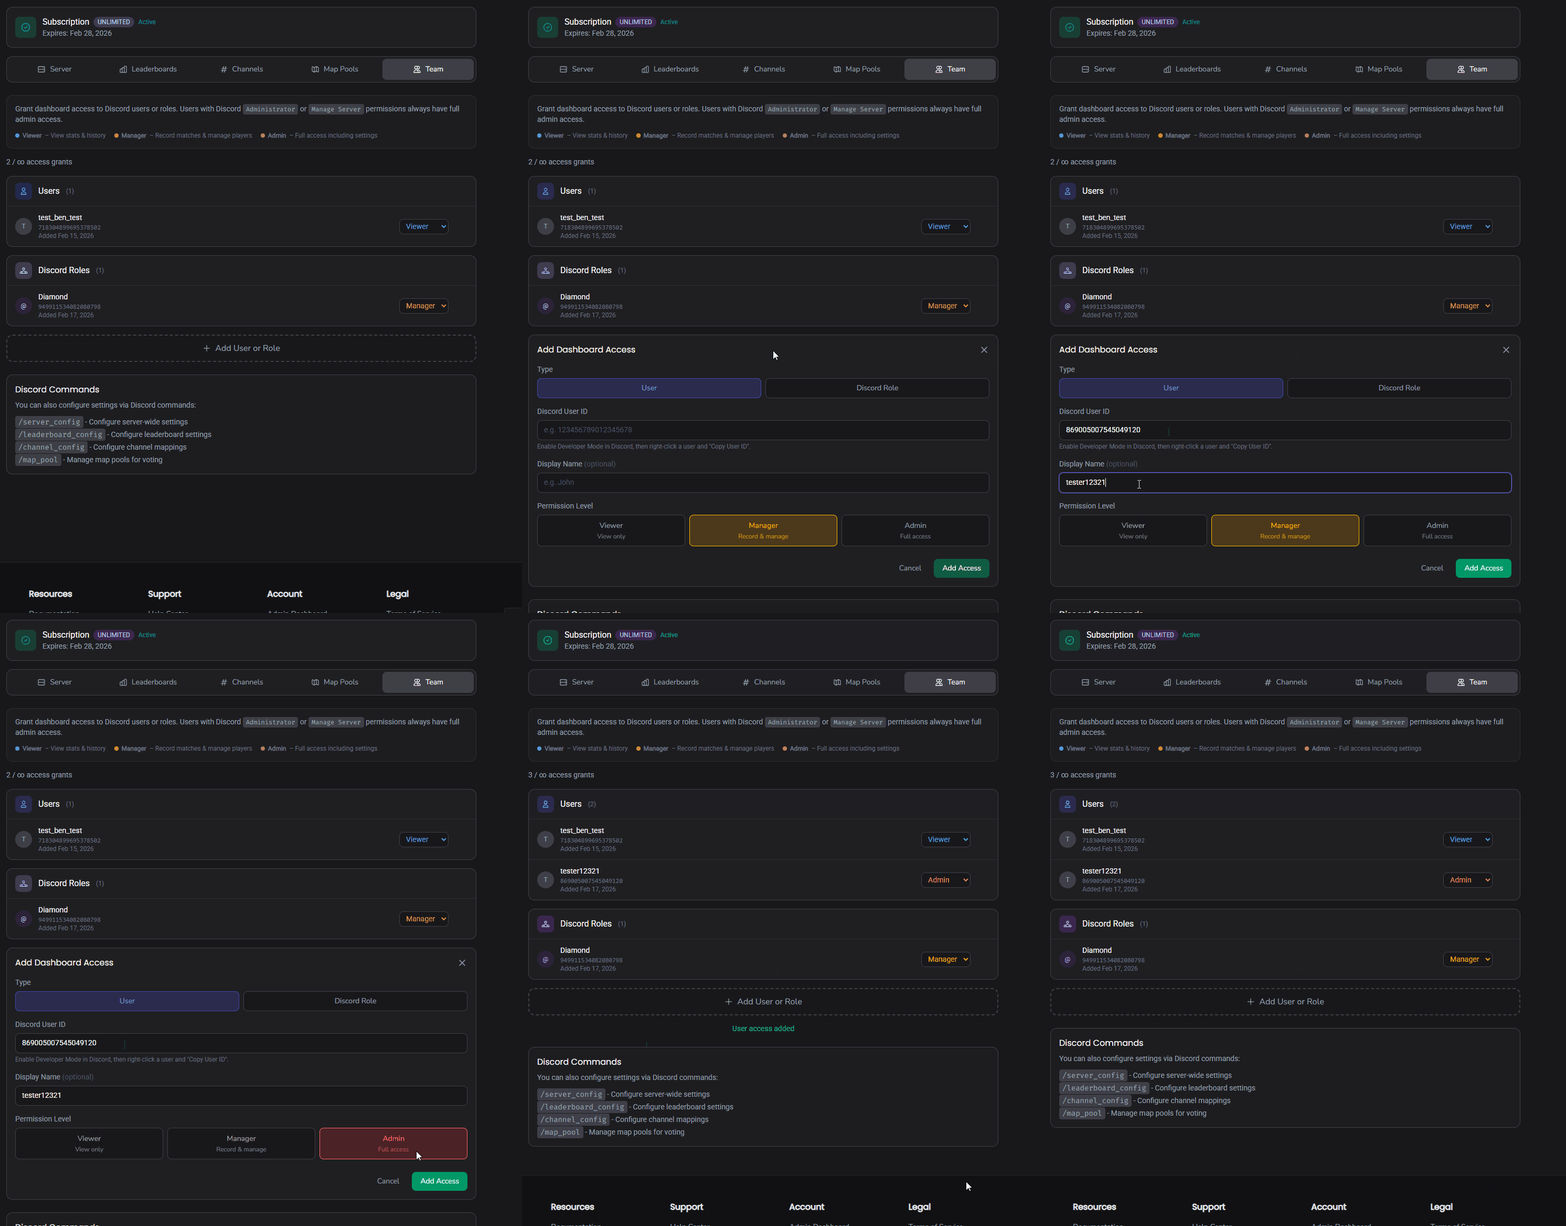
How to Add Team Members
- Go to Settings → Team in your server dashboard
- Click Add User or Role
- Choose whether you're granting access to a User or a Discord Role
- Enter the Discord ID:
- For a user: Enable Developer Mode in Discord, then right-click a user and select "Copy User ID"
- For a role: Enable Developer Mode in Discord, then go to Server Settings → Roles, right-click a role and select "Copy Role ID"
- Optionally add a display name so you can identify them easily
- Select the permission level: Viewer, Manager, or Admin
- Click Add Dashboard Access
Granting Access to an Entire Discord Role
This is the fastest way to onboard a moderation team. Instead of adding people one by one, grant access to a Discord role like "Tournament Organizer" or "Moderator." Anyone with that role will automatically get dashboard access when they log in.
If someone has multiple role grants that apply (e.g., they have both a "Moderator" role with Viewer access and an "Organizer" role with Manager access), the highest permission level wins.
Team Member Limits
The number of access grants you can create depends on your subscription:
| Tier | Access Grants |
|---|---|
| Free | 3 |
| Pro | 15 |
| Unlimited | No limit |
Each individual user grant or role grant counts as one toward this limit. If you need more, you can upgrade your plan.
Managing Existing Access
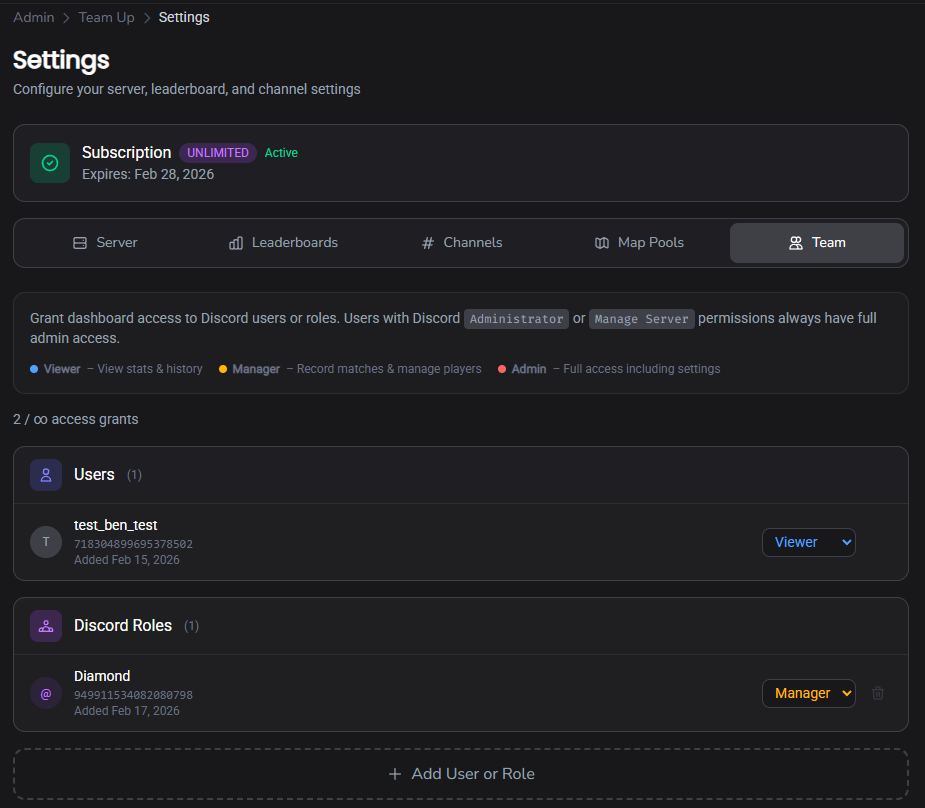
The Team tab shows all current grants organized into Users and Discord Roles sections. For each entry you can:
- Change the role inline by selecting a different permission level from the dropdown
- Remove access by clicking the delete button
- See when access was granted (date is displayed on each entry)
Tips for Setting Up Your Team
- Use role-based access when possible. It's easier to manage than individual users, and new staff members get access automatically when they receive the Discord role.
- Start Managers at Viewer if you're unsure. You can always upgrade their access later from the Team tab.
- Keep Admin access limited. Admins can change server settings, modify Elo configuration, and manage other team members. Only people who should be configuring the competitive system need this level.
- Set up an audit channel (Settings → Server → Audit Channel) so admin actions like match deletions get logged to Discord. This gives you visibility into what your team is doing.
What's Next
The admin dashboard keeps expanding. If you haven't set up your competitive system yet, start with the Elo leaderboards guide to get matches flowing, then come back here to configure everything from the browser.
Want to see how Team Up compares to other bots? Check out our comparison of the best Discord bots for Elo and matchmaking.
Questions? Check the full tutorials or ask in our Discord community.